Our bedroom is our safe place, our refuge, the one place that we can truly be ourselves. Shouldn’t it be welcoming, comfortable, and fit your personality too? YES, IT SHOULD! Last summer, I remodeled my closet to look like a sunset. The ceiling was black and filled with gems to look like stars! This summer, I thought my bedroom could use some remodeling as well. I thought that a zebra print on my wall was a bit much– especially since I already have that print on my dresser. So Aztec it is! I love Aztec design, culture, clothing, so much about the Aztec amazes me! I had done a research report on them this year and I just wanted to add that part of me to my own space.
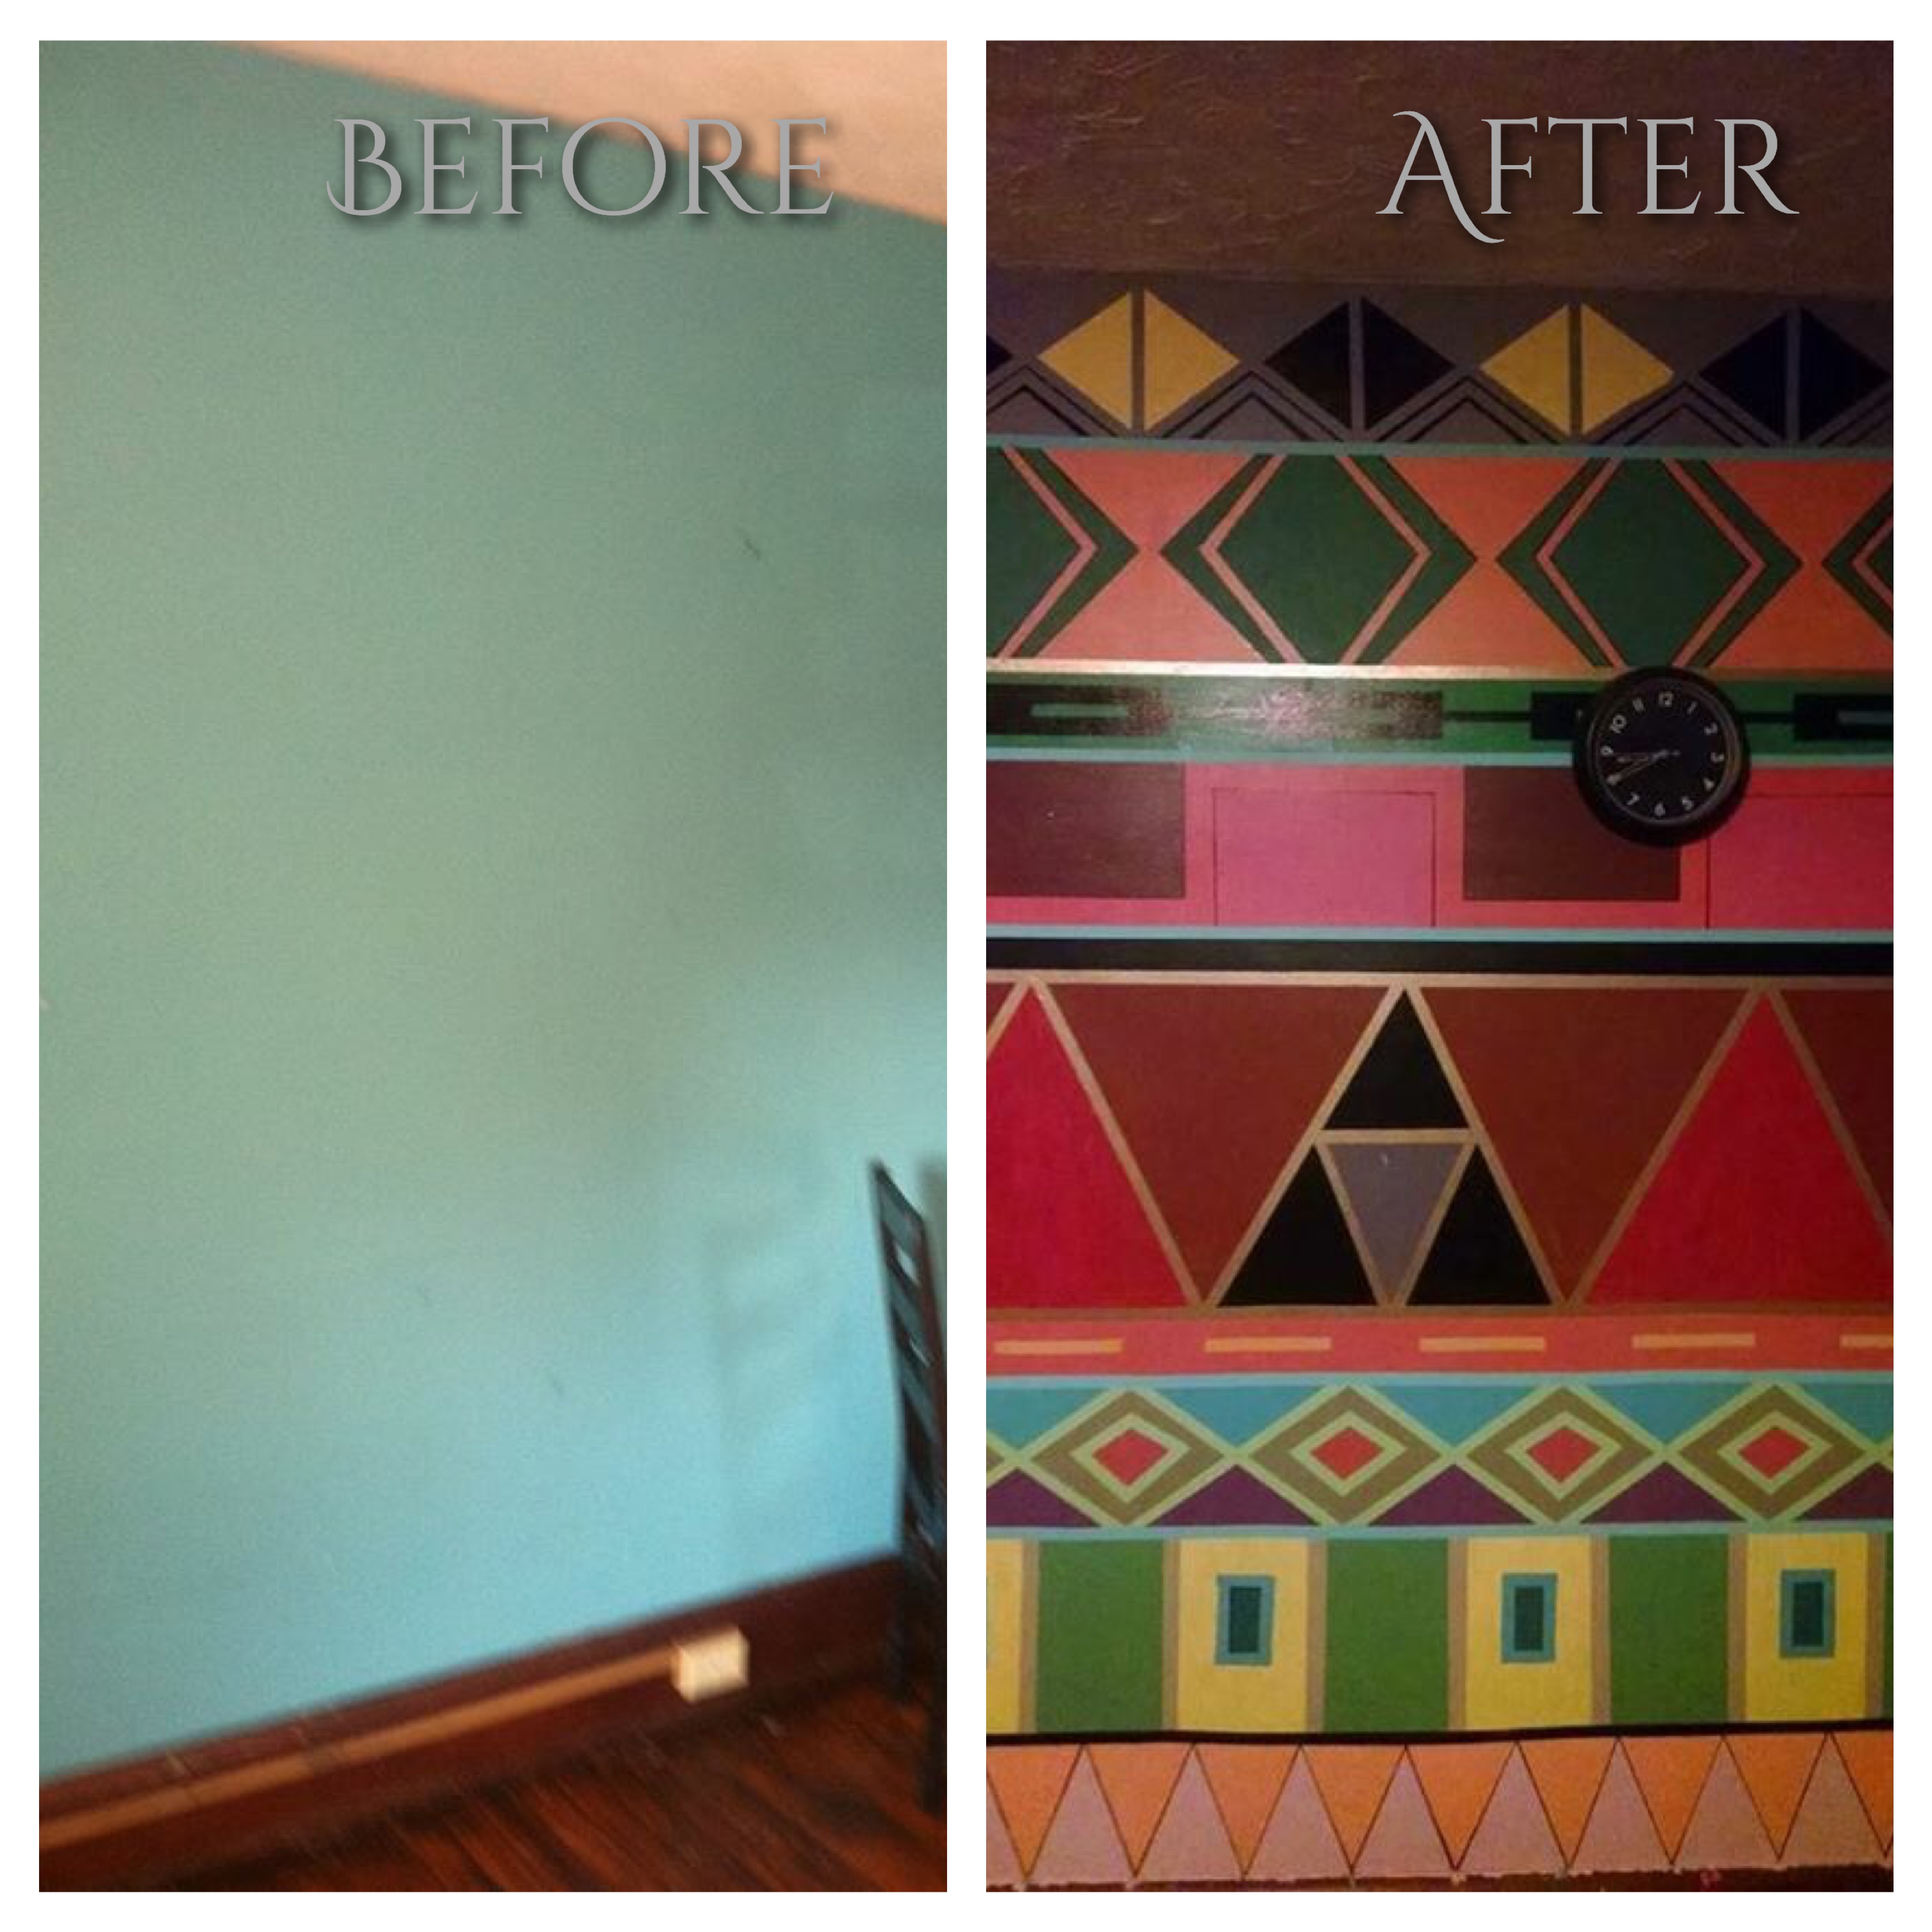
So, How did I make this happen? I started from the bottom- BIG MISTAKE!! as I worked my way up the wall, I would accidentally splash some paint, drip, or rub against the wall and I would have to repaint that section. START FROM THE TOP and work downward. I laid painters tape on the wall and painted in the colors that I liked. A.C.Moore had acrylic paint on sale 4 bottles for $1 so I definitely took advantage of that 😉 I blended colors and even added sparkles to some mixtures!
I had to learn the hard way how to keep the tape straight all the way across the wall. in the beginning, I tried to press the tape against the wall and measure it every few inches. This technique left it very, very uneven. Eventually, I tried to measure the height once on one end, loosely pull the tape across the wall, measure the height on the other end, and press the tape down. This took a lot less time and the tape was much straighter against the wall.
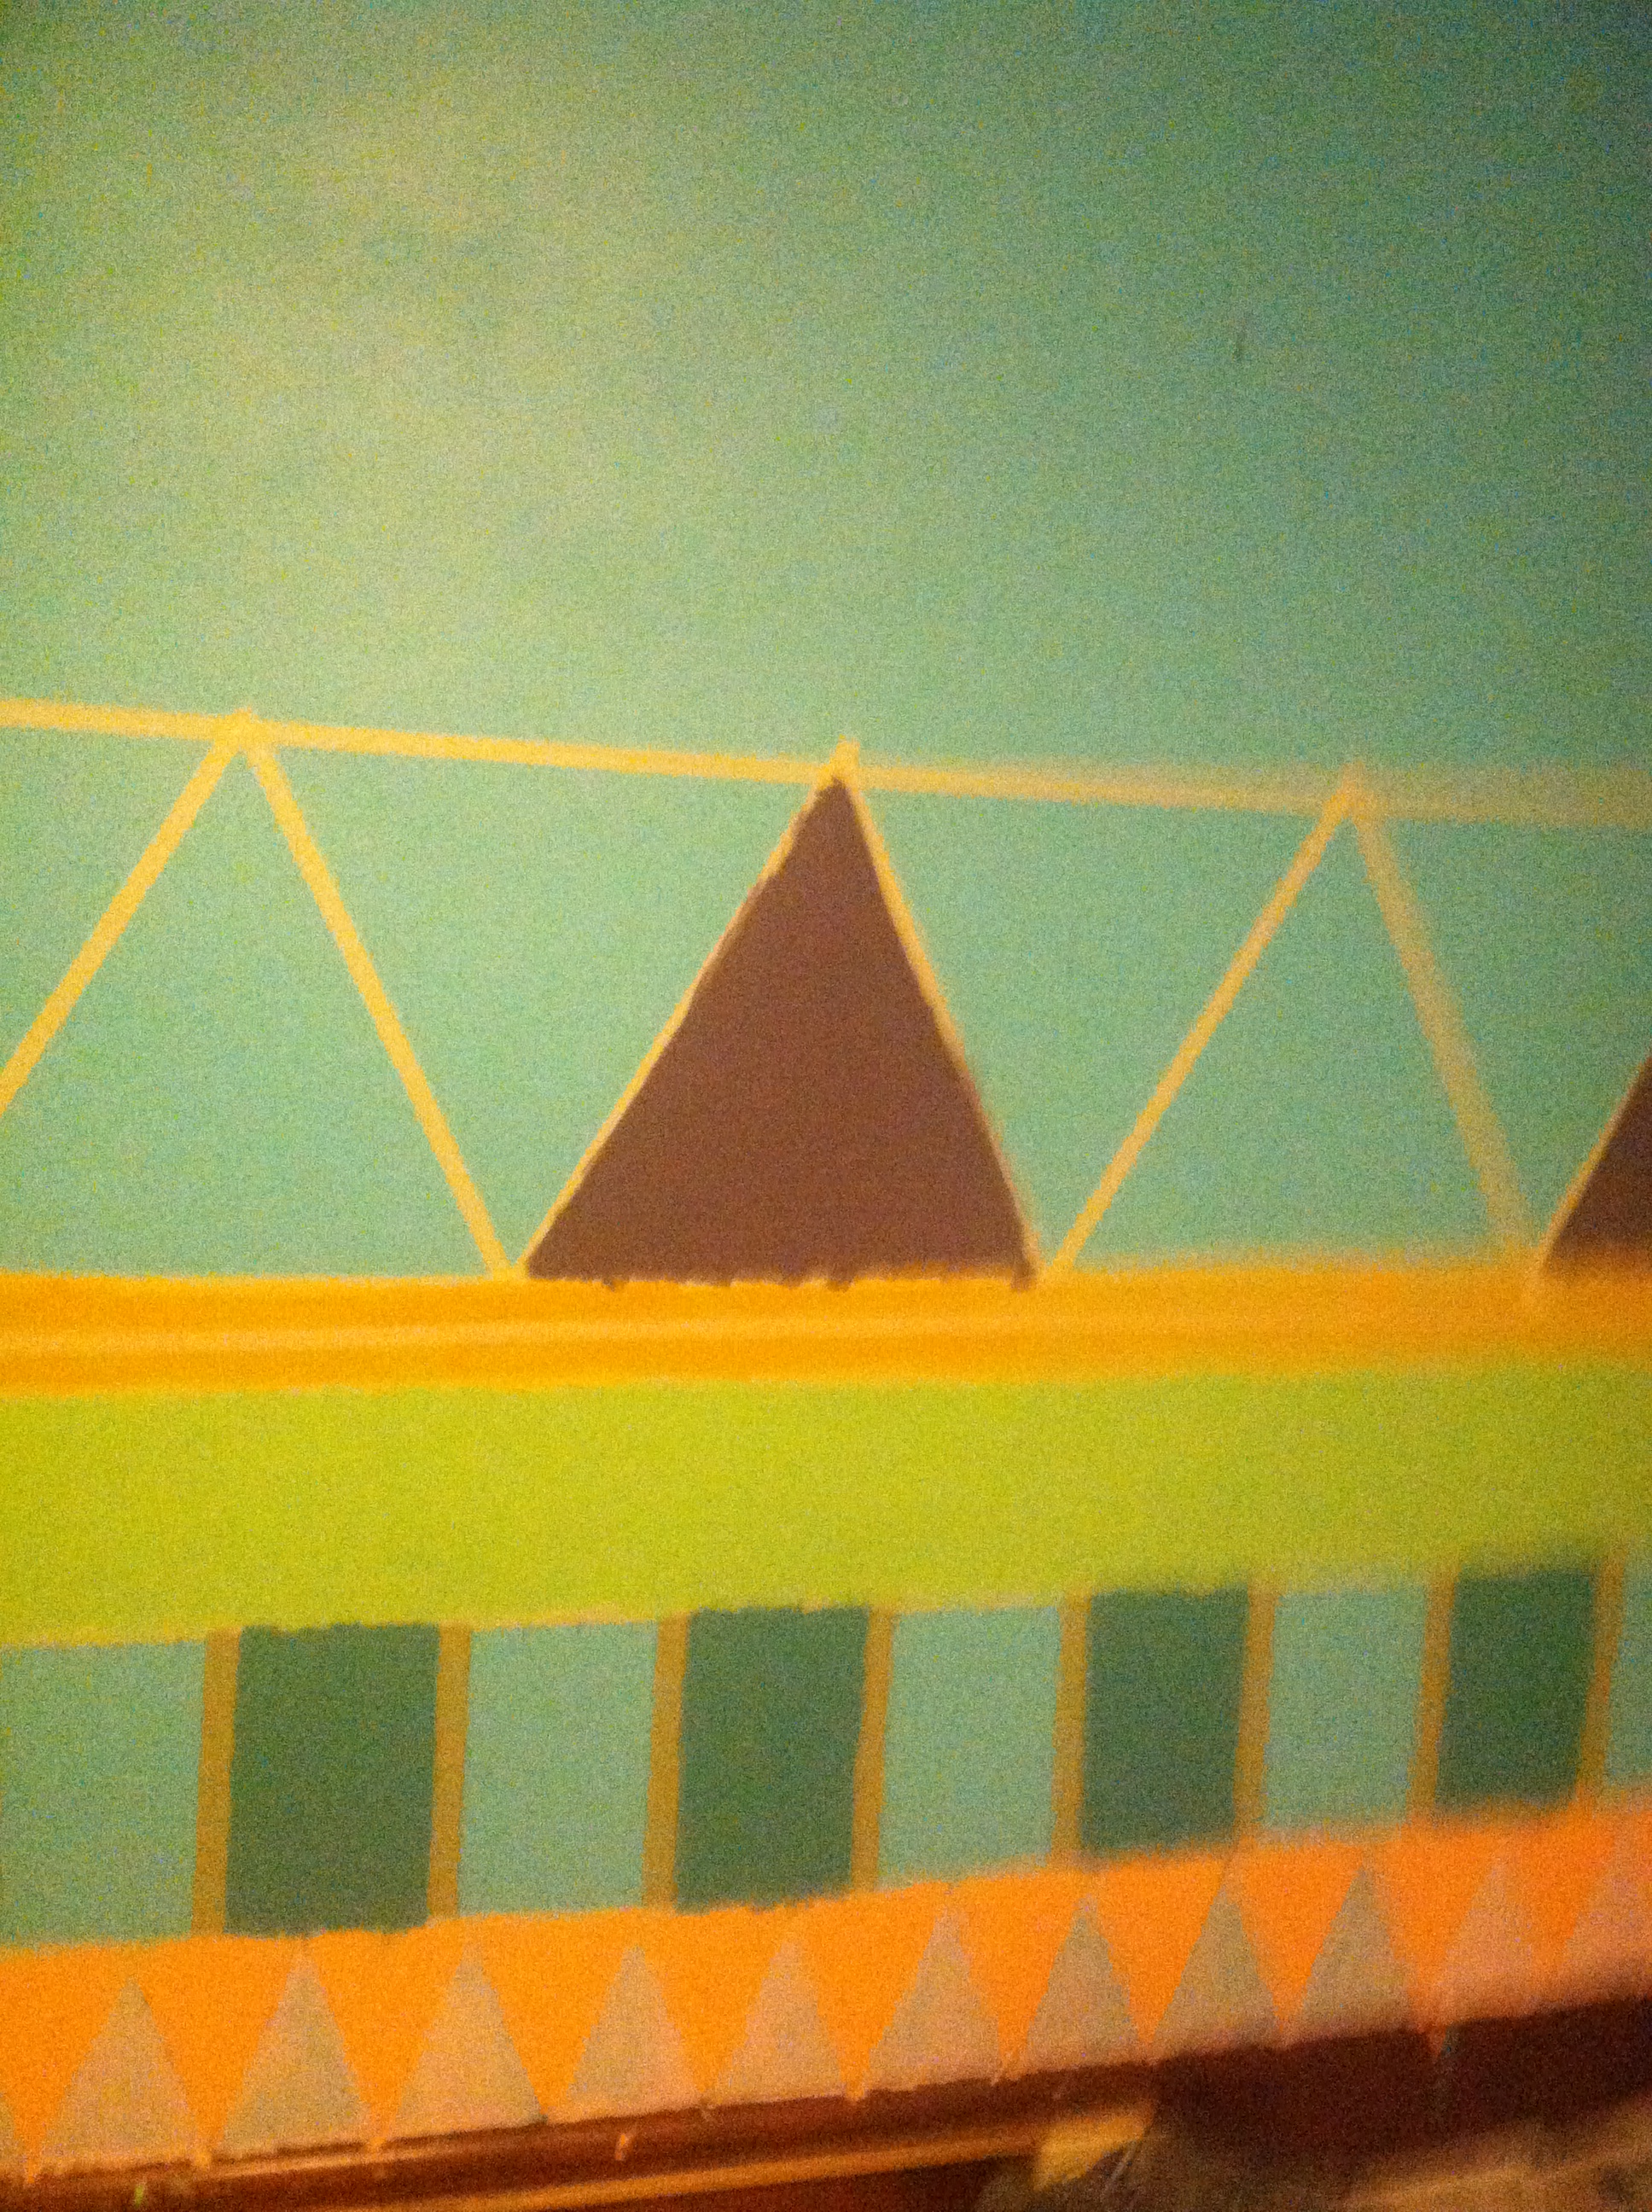
After I had the base colors dry for a few rows, I painted ‘details.’ I bought a gold paint pen and filled in the lines. I wasn’t sure how it would turn out with this; I didn’t want the gold to look cheap. However, it turned out beautifully! I was a nice metallic and a bold touch that simply made this project!
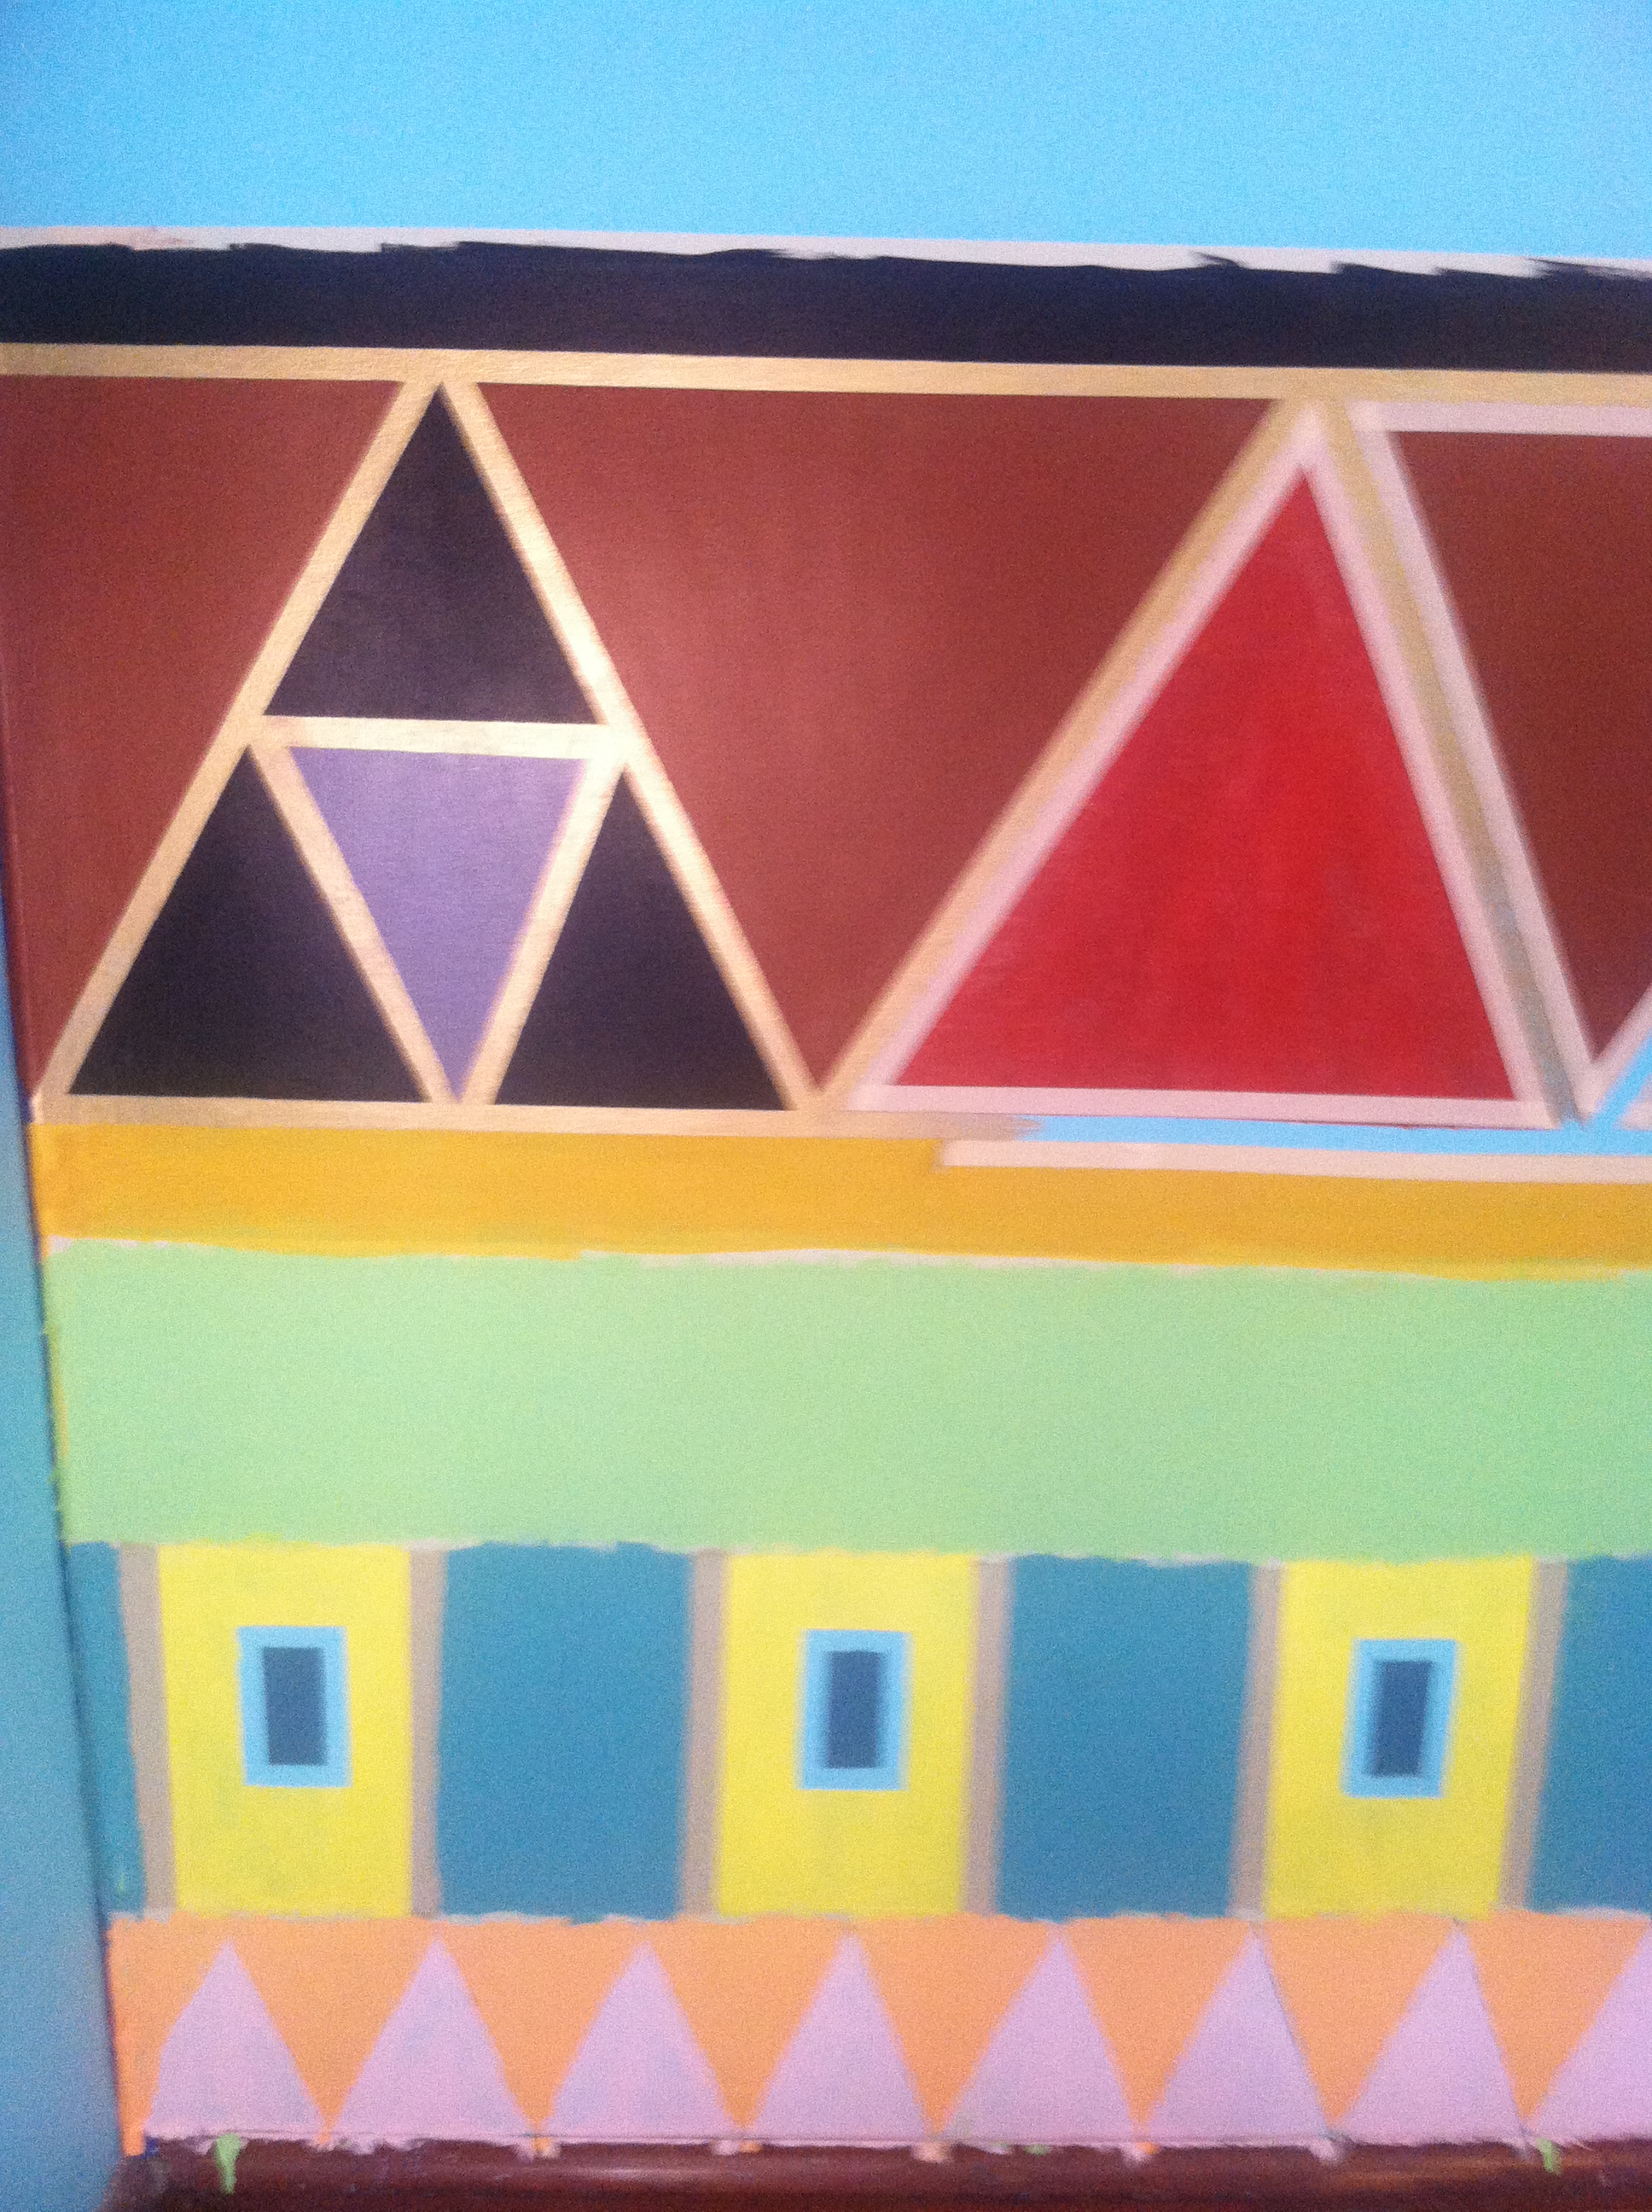
I continued up the wall, taping, painting and detailing all kinds of shapes! And of course, due to my brothers’ addiction to legend of Zelda, I HAD to have a tri-force! (Which I had failed to perfect.) It was almost finished and it seemed like something was missing, but a little black outlining was just what it needed! I lined most of the shapes and adored how it looked! Finally, after layers after layers of paint, Creativity overload, much frustration, and too many tears to count, I finally finished!!
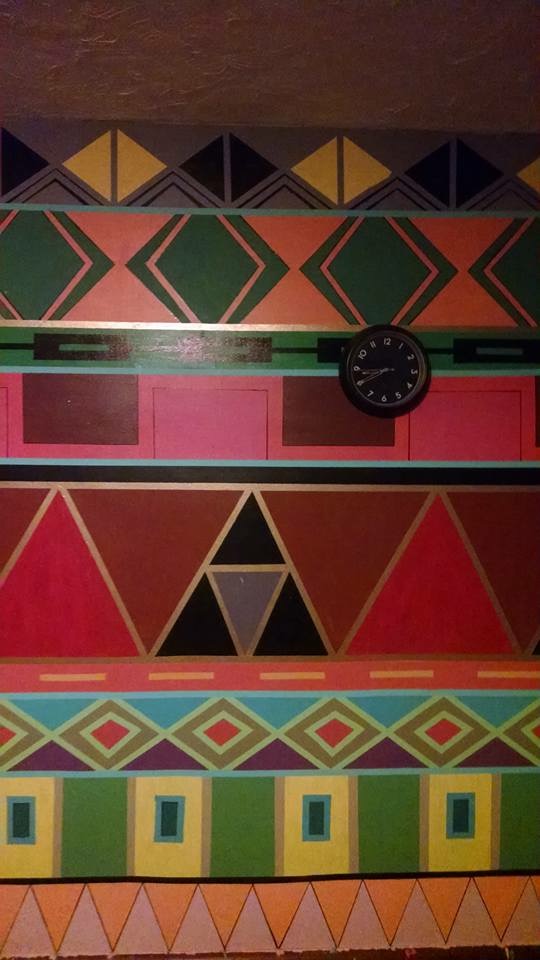
This was a fun project! It took me a few weeks to do since I had done it in my spare time during the summer. And I had a LOT of learning to do! All in all, I am very proud of how this turned out and honestly, I wish I had more walls to do this to!
